Some more photos

Thursday 8 December 2016


Here are some 'glamour shots'


Back Street Heroes

Its been published.....


... Not too shabby eh?


I was only expecting perhaps a small pic...  I could get used to this...

Another pic

Tuesday 8 November 2016

After meeting a mate up the pub, he sent me this pic.

Its the only photo I currently have with me on the bike.

Ignore the oil marks on the tarmac..... It has sprung a transmission oil leak, I nursed her home, parts ordered and will fix her over the winter.

Published in print!

Tuesday 1 November 2016

News flash folks!
My bike will be featured in Decembers issue of back street heroes!
Watch this space!!!

Good times

Wednesday 19 October 2016

Past with flying colours!

Sunday 13 March 2016

She sailed through the MOT with no issues. Now I just need to get some good photos of her out on the road. I have a few parades and shows lined up through the year, so watch this space.
It's taken a while.... I've enjoyed the whole process and as for how she's turned out, well......I think she's a stunner!
Now the really fun part begins, getting some miles done.


Time for testing

Tuesday 1 March 2016

Well.... it's done! I've booked it in for an MOT in 2 days time. I've bled the breaks and fitted the horn.  The front caliper was leaking brake fluid. Thankfully it was just a dodgy O-ring which was easily replaced.
Bleeding the rear brake was a bit tricky.  In the end I build a home made vacuum bleeder from an old hoover, a bottle and some plastic pipe.  It gave me the helping hand I needed in getting the brake line primed. Both front and rear pressure switches work like a dream for the brake light. So happy days!
My homemade pressure bleeder.


I've given it a quick test ride... all is good. The springers are interesting and a new feel. But all considered I'm extremely happy with the ride quality. Fingers crossed for the MOT. If all goes well I shall post some finished shots of her in a better location than my garage! What a journey it's been....here's to many more with my beauty!


Levers on, horn in progress. :)

Monday 1 February 2016

It's been a progressive weekend. I've fitted the levers and currently I'm waiting for the brake pressure switch to arrive to complete the brake setup.


I've installed the horn pump into the cover, I've wired in a relay to allow a thin signal wire to run up to the horn button.
Interestingly the wiring instructions were incorrect in the horn packaging. But all is sorted now.


I definitely feel I'm on the home straight with this build.

Horn n levers

Monday 25 January 2016

I've received the replacement horn I've ordered. I've gone for a 139 decibel airhorn. It's definitely loud enough...haha.

The assembly is a bit on the large size but after not getting it to fit sufficiently I've opted to break the assembly down into two parts. I will connect the pump to the horn section remotely.
I've had some luck with a regulator cover I brought off Ebay and haven't used.  Thankfully the airhorn pump section fits in it perfectly, I just need to modify the cover a little to sufficiently hold the pump and bolt to the frame. Happy days!

Complete assembly.

Unassembled pump section in regulator cover.

I've ordered some levers too.... very happy with the look of these beauties.

Gremlins 'done one'

Monday 11 January 2016

After some detective work I found the loose connection  was in the handlebars. Under vibration the wire was earthing where I snagged it on the drill hole in the bars. Filed down the burr and put heatshrink on wire and all is sorted.
It would have been a nightmare to go through the wiring under the tank as it's all wrapped up and hidden.....so a right result there.

Number plate is on. Happy with the look of it. So only levers, horn and a few random nuts and bolts to order and she ready for the MOT.....

Decided I don't like the dustbin lid sized horn I got from eBay. ... it's like bolting a spare wheel to the bike! So I'm looking for a small but mighty one...perhaps an air horn might be in order.... I don't want it to take up too much space though.


Electrical Gremlin

Saturday 9 January 2016

Annoyingly the main beam switch doesn't work when the engines running. The latching switch is permanently on main beam. It works fine with the ignition on and up to now I've thought all was well. It's not a big deal, just a bit frustrating that I will have to unpick the wiring and sort it out.
I should have checked it while it is running.  Oh well, my first ever wiring loom build from scratch was going a little too well perhaps haha.

Good points are that I have reassembled the side stand onto the bike. It's good to see her standing by herself rather than on the jack. I brought a new spring but I'm not 100% happy with the stand position when it is stowed. Just a few niggley jobs left as well as the levers I'm yet to buy.

Seen a nice set on Ebay but still looking around as no rush while I have the number plate and now the wiring to sort out.

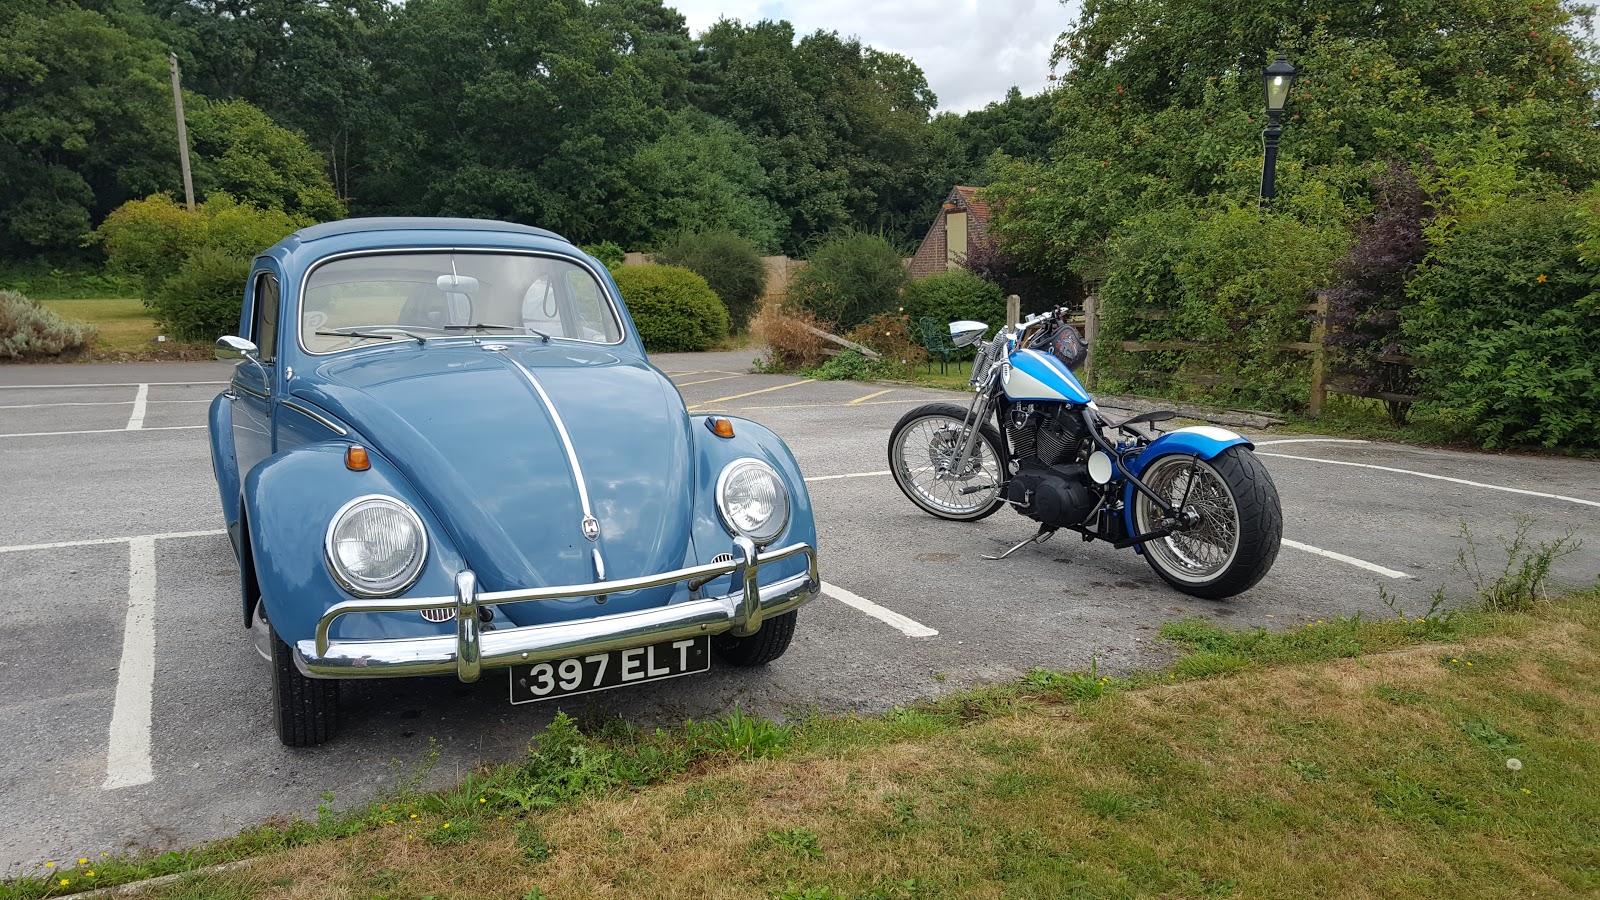
Plate arrived which I'm happy with. The plate surround doesn't fit too well and covers up some of the letters on the plate. I'm going to cut up the surround a bit and then spray it up with a rattle-can.

I've called it a day today though. The wiring has bugged me a bit and I don't want to rush the fix. I'm off work next week for a few days holiday, I'll sort out the wiring then.

I might tinker with the number plate tomorrow as it's a fun job, wiring is a royal pain in the ass! :)

Nearly finished

Wednesday 30 December 2015

It's been a long couple of days but I have finished touching up the paintwork on the engine. 

I have drilled the handlebars and finished all the wiring, i decided to feed the light and horn wiring through the handlebars which was fun (of sorts) it tried my patience as the wires kept snagging inside the bars, but all is good and it's now looking neat, so was the right decision.

I've also fitted the fuel tank and rear mudguard which was a real turning point and I'm very happy with the results.

All that is left now is to fit the clutch and brake levers and connect up the brake lever switch to the wiring exiting the bars, I also need to fit and wire the horn and weld the rear brake pedal, after it got damaged when it toppled over.


I need to purchase the bar controls, so time to surf through Ebay. The bike runs very well and i'm extremely happy with the progress this week.

I'm still not convinced with the horn I got a while ago though... I'll fit it and see how it looks.

She is alive!

Monday 28 December 2015

Well.... it's been an eventful few weeks.
Firstly the bad stuff.... the bike jack gave way... We'll to be honest the lock wasn't put back by me and the gas strut went down and the bike fell off the stand. Thankfully no big damage was done, however the headlight got mashed so I brought a new one. 

Cheaper alternatives were available but I love the look of the fang style so after import duty I am down around £230, it could have been worse though thankfully no other damage was done. If I had fitted the gas tank I would have been gutted.

I also spilled fuel on the engine and it's stripped a patch (I guess the paint wasn't fully cured). So I'll need to touch up the paint on the engine.

Positives though are I have started her up. Thanks to Chris from P&D for lending me a battery so I can do all the wiring and testing without using my lithium ion one (amazing light weight and small but should never be fully discharged or they are scrap).
After loosely wiring her up and putting a temporary bottle on the bike as a fuel tank she fired into life straight away. She runs beautifully but the first impression would be ..... F*CK ME THAT'S LOUD!!!!!!

It really is epic sounding.... it's  beautiful to look at but with a dead awakining, possessed by the devil roar......really a wolf dressed in pageant material clothing, Perfect.
So I've spent to last few days over the Christmas holidays (between eating and drinking loads) tidying up the wiring. This morning I fitted and wired the brake light and headlight.

The battery compartment is all sorted now. I had to modify it to clear the rear brake reservoir which allowed me to include an integral pressure switch for the rear light. I'm very happy with the way the wiring has turned out so far. I've hidden as much as possible and it's all looking neat.

Next is to finish off the wiring. Drill the handlebars for the horn and main beam switching wiring. I need to locate the horn somewhere. He one I ordered off the Web is larger than I expected but I may use it anyway....Then I can fit tank and rear mudguard. Things are going well and its looking good to have it finished in time for summer.


Perfect paintwork!

Sunday 8 November 2015

It's been a busy 3 weeks at work, with business trips and late nights, so progress has been a little slow lately.... However the tins are back from paint. I'm very happy with the colour, style and finish. Thanks to Tony at 'cycle sprays' who's done a great job.


I've fitted the oil tank and oil lines and filled with oil. 

All is well so far, however with no fuel in the system and with the quad bike battery not quite man enough to fully turn over the engine, the big initial start-up is yet to happen. My plan is to start it up next weekend with a car battery and a bottle of fuel.

I won't fit the gas tank until it's fully running and wired. The tins are things of beauty and I only want to fit them once to minimise risk of damage.

......all is coming along nicely, taking shape and beginning to look mighty fine....looking forward to hearing her roar!